
Step 1: Start with a Clean Canvas
Achieving flawless makeup that lasts all day begins with starting on a clean canvas. Proper skin preparation is essential, as it can significantly influence the longevity and appearance of your makeup. The very first step involves cleansing your face to remove any impurities, oils, and residues that may have accumulated throughout the day. Using a gentle cleanser formulated for your specific skin type will help ensure that your skin is prepped adequately for the next steps in your makeup regime.
Following cleansing, it is crucial to exfoliate the skin to achieve a smooth surface. Exfoliation helps to eliminate dead skin cells, allowing your makeup to apply evenly and preventing patchiness. Depending on your skin\’s needs, a chemical exfoliant, such as one containing alpha-hydroxy acids, may be appropriate. Alternatively, a gentle scrub can also be effective in refining the skin texture. Aim to exfoliate 2-3 times a week for optimal results; this will create a radiant base ready for makeup application.
After exfoliation, hydration becomes a pivotal component of your preparation process. Applying a suitable moisturizer helps to nourish the skin, preventing dryness and flakiness that can compromise your makeup\’s adherence. It is important to choose a moisturizer appropriate for your skin type—whether oily, dry, or combination. To further enhance the effectiveness of your makeup, consider the use of a primer. A good primer can smooth out imperfections, minimize pore appearance, and create a barrier between your skin and makeup, ultimately extending its wear. Selecting the right primer tailored to your skin type will allow for better makeup application and longevity. With this well-prepared canvas, you are now equipped to proceed with your makeup routine, ensuring that your look stays fresh and vibrant throughout the day.
Step 2: Apply a Long-Wear Foundation
Choosing the right foundation is crucial for achieving a flawless makeup look that endures throughout the day. Long-wear foundations come in various formulas, including liquid, cream, and powder, each catering to different skin types and preferences. When selecting a foundation, it is important to consider your skin’s characteristics such as oiliness, dryness, and sensitivity. Liquid foundations are versatile and can provide a natural finish, making them ideal for dry or normal skin. Cream foundations offer fuller coverage, often suitable for combination skin, while powder foundations are typically best for oily skin, as they help to control shine.
To ensure an appropriate match, it is advisable to test foundations on the jawline or wrist rather than the back of the hand, as this area better reflects your natural skin tone. Additionally, factor in your lifestyle—if you are often exposed to humidity or sweat, a matte finish foundation with long-lasting properties can be beneficial, whereas a dewy finish might be more suitable for indoor environments.
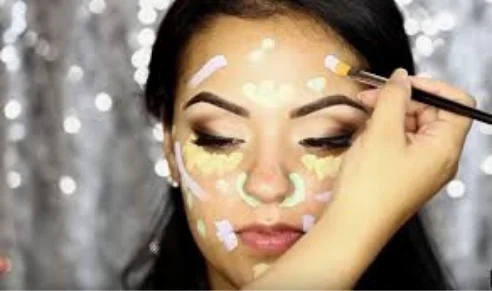
When it comes to application, using the right tools can significantly influence the final appearance. Brushes, sponges, and even fingers can be employed for an even application; however, sponges are known to create a seamless blend. Start by applying a small amount of foundation to the center of the face and blend it outward. For building coverage, add more product gradually instead of applying a heavy layer all at once. To enhance the durability of your foundation, consider setting it with a translucent powder or a long-wear setting spray. These techniques not only prolong wear but also help maintain a polished finish throughout the day. By following these suggestions, you can achieve a flawless foundation that withstands the test of time.
Step 3: Perfect Your Complexion with Concealers and Setting Powder
Achieving a flawless complexion is essential for a long-lasting makeup look, and concealers play a pivotal role in this process. To cover blemishes, redness, and under-eye circles effectively, selecting the right concealer is the first step. Choose a formula that complements your skin type; creamy options are generally best for dry skin, while those with a matte finish work well for oily skin. Additionally, consider the shade carefully—select a concealer that is one or two shades lighter than your foundation for brightening areas like under the eyes, while opting for one that closely matches your skin tone for blemish coverage.
When it comes to application, employing the right tools can make a significant difference. A small, flat brush or a sponge, such as the beauty blender, can help in achieving an even application. Start by dotting the concealer on the problem areas, then blend using quick, gentle tapping motions to ensure the product melds seamlessly with your foundation. For under-eye circles, it is effective to apply the concealer in a triangular shape, which not only provides coverage but also enhances the overall lifting effect of the face. Avoid heavy layers as they may lead to creasing and can contribute to a cakey appearance.
Once your concealer is in place, setting it with a translucent setting powder is crucial. This step locks in the concealer and foundation, preventing any creasing throughout the day. Using a fluffy brush, lightly dust the setting powder over your T-zone and areas where you applied concealer. It is important to use a minimal amount to avoid a powdery finish; instead, focus on a light application that eliminates shine and promotes a smooth appearance. By perfecting your complexion with concealers and setting powder, you create a solid foundation that allows the rest of your makeup to shine and lasts longer, ensuring you look fresh throughout the day.
Enhancing Your Features with Blush, Bronzer, and Highlighter
To achieve a radiant and polished appearance, the application of blush, bronzer, and highlighter plays a vital role in makeup technique. These products not only add color but also define the contours of your face, giving you a sun-kissed and vibrant look. To begin with, selecting the right shades is crucial. For those with fair skin, soft pinks or light peaches work best; medium skin tones can opt for rose or coral colors, while deep skin tones are complemented beautifully by rich berries and warm bronze shades. Understanding your skin\’s undertone—whether it\’s warm, cool, or neutral—will also guide your choice of products.
When applying blush, aim for the apples of your cheeks. Use a fluffy brush to blend the color seamlessly into the skin, moving it slightly back toward your temples to create a naturally flushed effect. For bronzer, it is important to add warmth, so apply it to areas where the sun would naturally hit: the forehead, cheekbones, and jawline. A bronzer with a sheen can provide a sunlit glow, while a matte finish allows for contouring effects.
Highlighter serves to draw attention and add dimension to the highest points of your face, such as the tops of your cheekbones, brow bones, and the bridge of your nose. Using a fan brush or your fingertips, apply it sparingly and build up to your desired intensity for a luminous look. Layering these products effectively is essential for longevity; after applying bronzer and blush, consider a light dusting of translucent powder to set them before adding highlighter.
Ultimately, the combination of blush, bronzer, and highlighter, when applied thoughtfully, can transform your features and enhance your overall makeup look, allowing you to face the day with confidence.